Room Flows
The same screen flows available to Salesforce users may also be published to iDialogue rooms for use in customer onboarding, intake flows, product configuration, and many more use cases that benefit from guided screen flows.
Requirements
Requires iDialogue package v1.259 or greater.
Utilizes Salesforce Lightning Out.
Configuration
Enable screen flows in iDialogue rooms in 4 steps:
- Establish a trusted Salesforce hosting domain by creating and activating a Salesforce Site
- Enabling Cross Origin Scripting (CORS) for the trusted site
- Creating a screen flow that accepts a Record, Room, Member ID inputs
- Adding a screen flow script to a room template
Salesforce Site Configuration
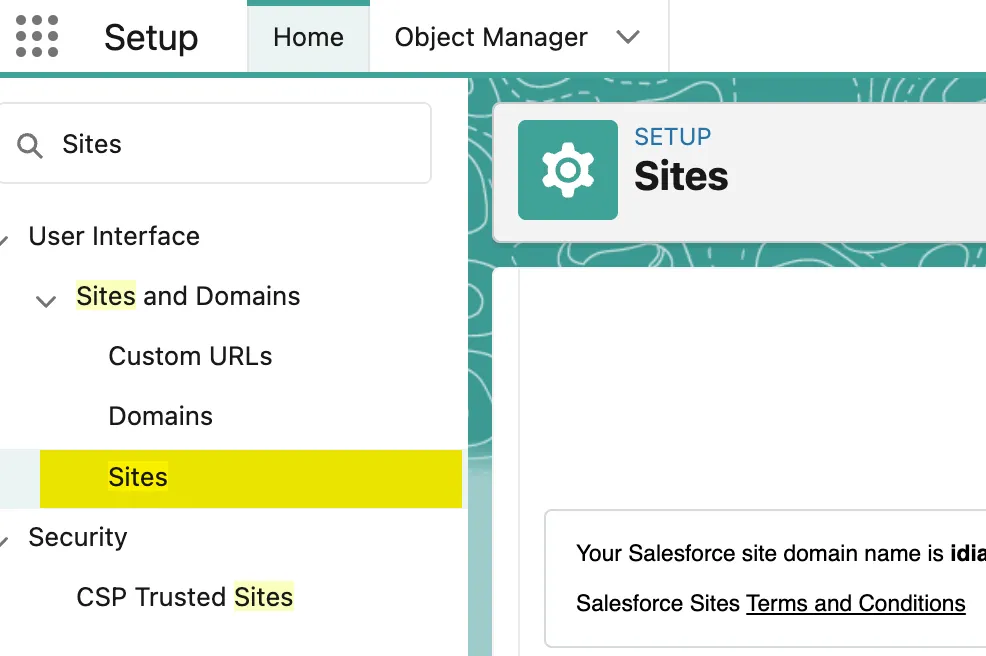
Setup a Salesforce Site to host the Lightning Out screen flow. From Setup->Sites create a new Site. The screenshots in this article refer to a site named “flows”.
The new site will run with the permissions of a Site Guest User and Profile. From site details, click on the “Public Access Settings” then grant access to objects used in the screen flow(s).
For example, if onboarding a Contact using a Room Flow, the public access settings must have Read access to the Contact object to view their personal Contact details. Write access must be granted to Contacts if the screen flow will update a Contact.
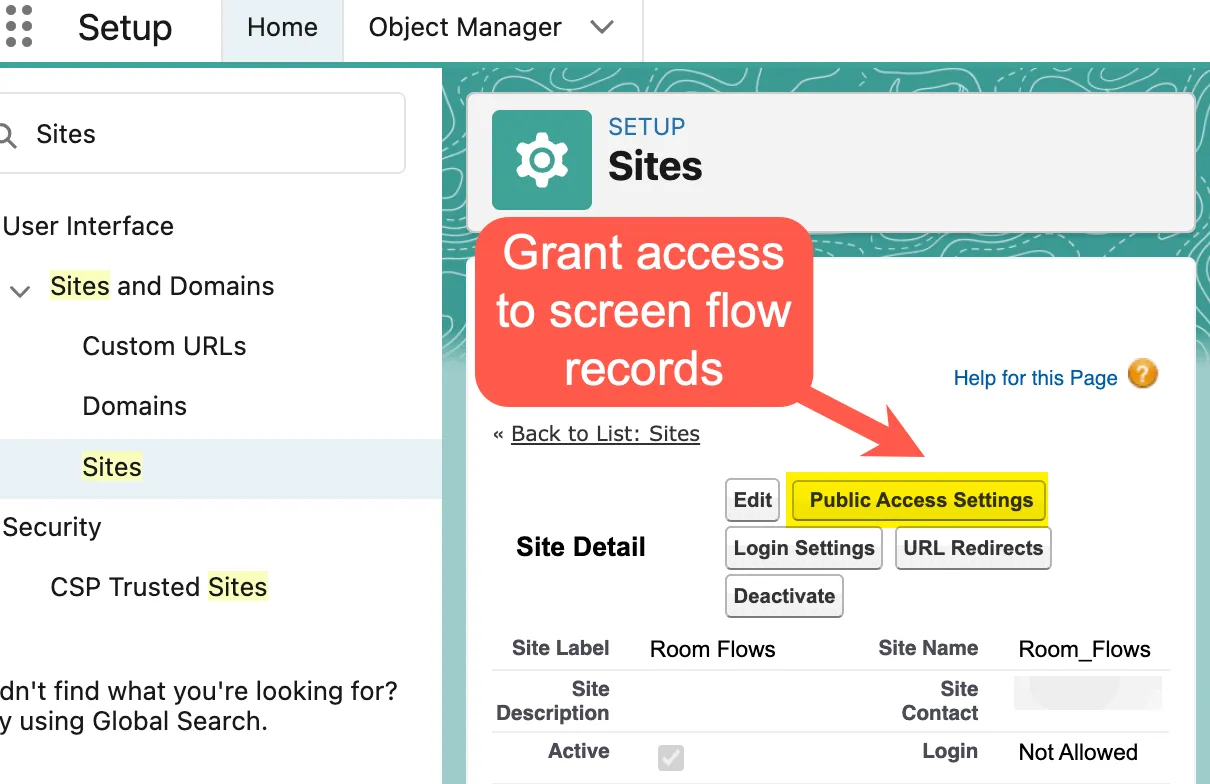
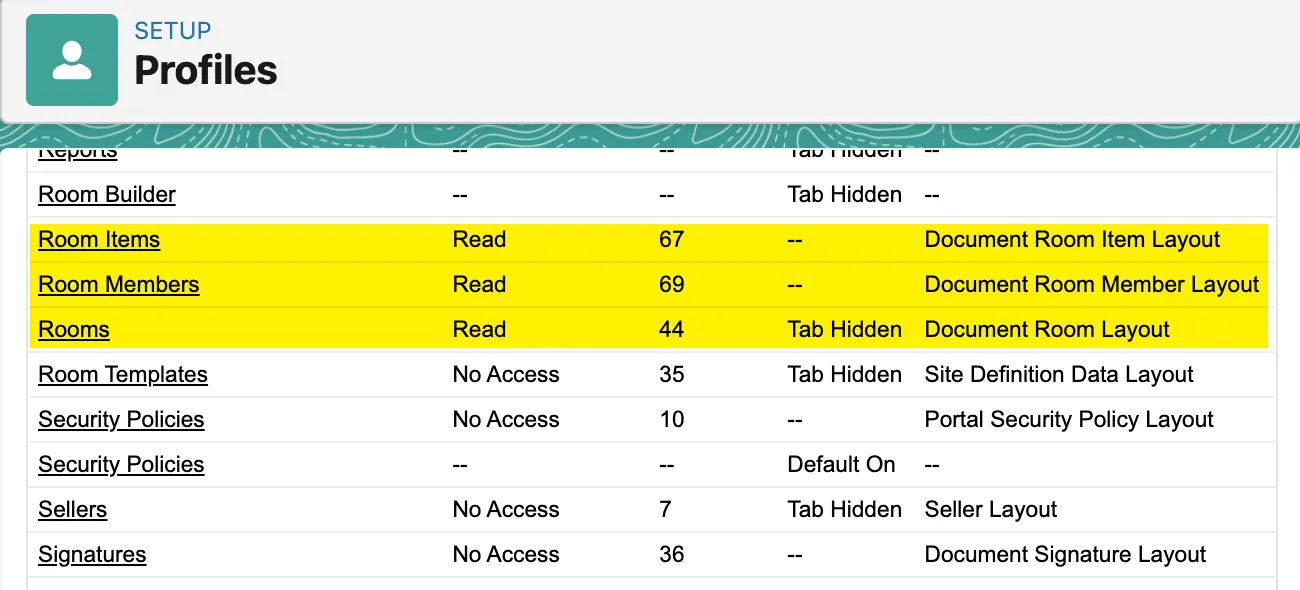
The Site Guest profile must also have Read access to the following iDialogue records:
- Room (required)
- Room Member (required)
- Room Items (optional)
Lear more about granting access to Site Guest Users: https://help.salesforce.com/s/articleView?id=sf.networks_public_access.htm&type=5
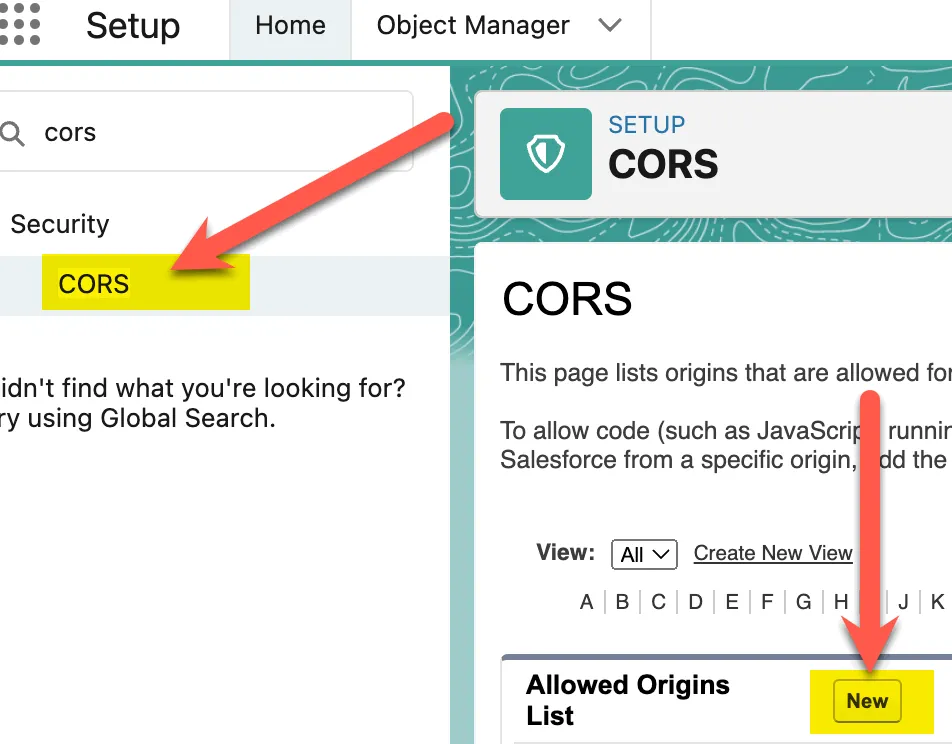
Cross-Origin Scripting (CORS) Configuration
The Room flow will make a cross-origin scripting call to the Salesforce site from the rooms domain.
From Salesforce Setup->CORS, grant cross-origin access to the following domains:
- https://*.i-dialogue.com
- https://rooms.i-dialogue.com
- https:// [your custom site domain ] (created above)
- https:// [ your custom room domain ] (if applicable)
Designing and Creating Screen Flows for Room Members
Create a screen flow with the end customer in mind (Lead or Contact). All standard screen elements, Next and Previous buttons are available.
Input Variables
The screen flow must define 3 input variables:
- recordId
- roomId
- memberId


These input values are used to retrieve the Room and RoomMember context of the screen flow.
The RoomMember has lookup references to Lead, Contact, and User records (depending on the room context).
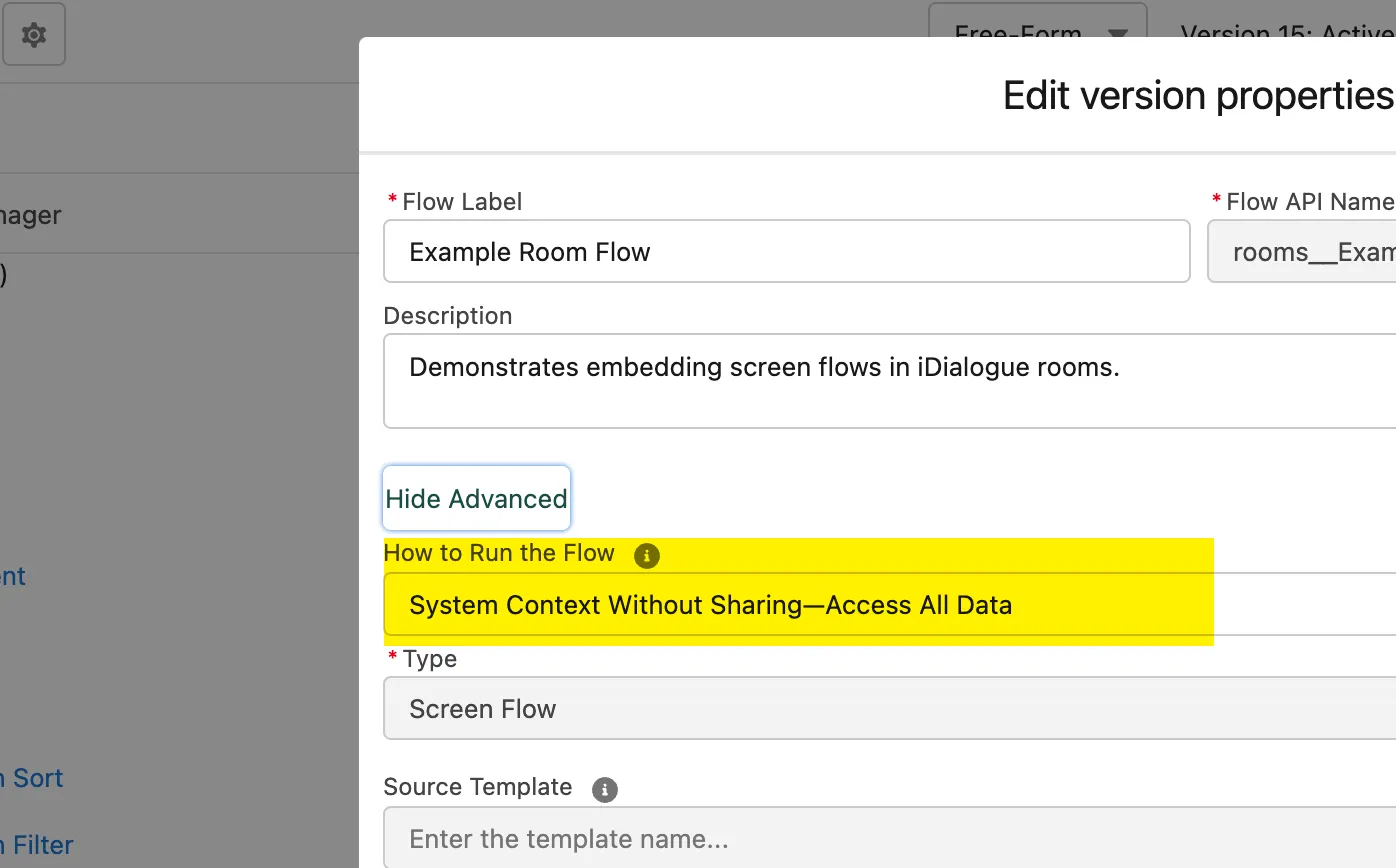
Flow Run As “System Context”
The flow must run in a System Context.
From the flow gear icon -> Advanced Settings -> How to Run the Flow:
Select “System Context”. Either with sharing or without sharing, depending on the Site Guest User profile access permissions configured.
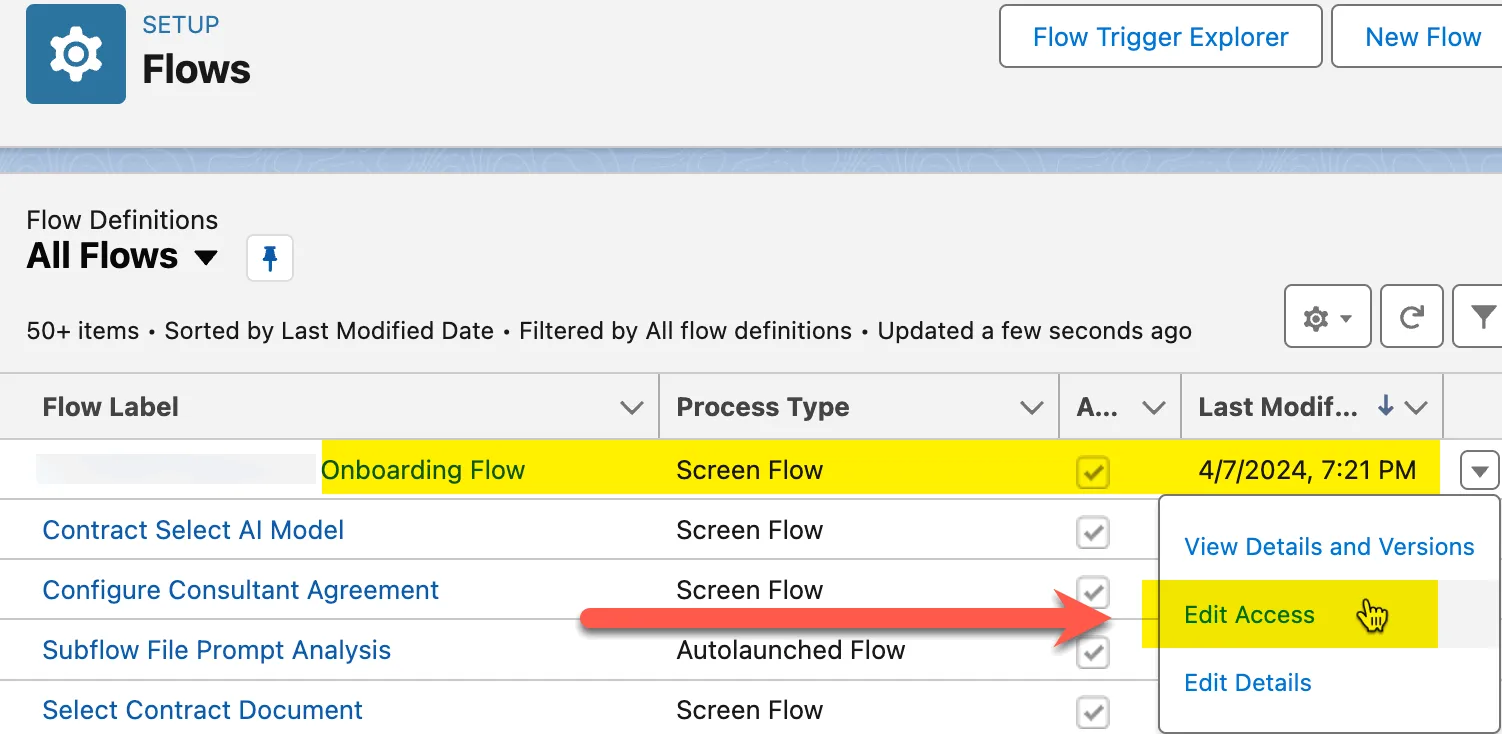
Grant Site Guest Profile Access to Flows
By default, the site guest profile does not have access to any flows. And editing the “Flow Access” permissions under profile will not display any available flows for execution until the flow has been overridden to allow profile-based access.
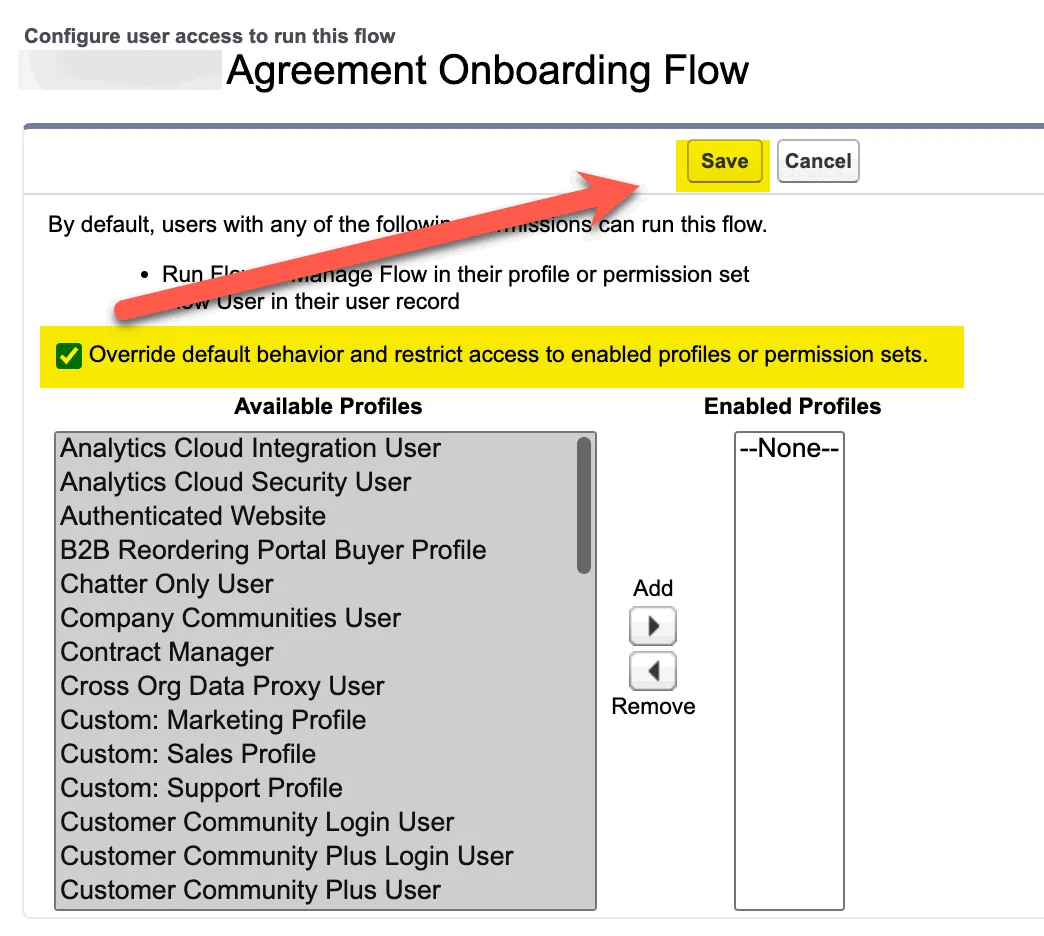
- Flow- Edit Access. Identify the flow to be granted access to rooms and select “Edit Access”.
- Override default behavior and restrict access to enabled profiles. It’s not necessary to select or enable any profiles (and the site guest profile will not appear in this list.)
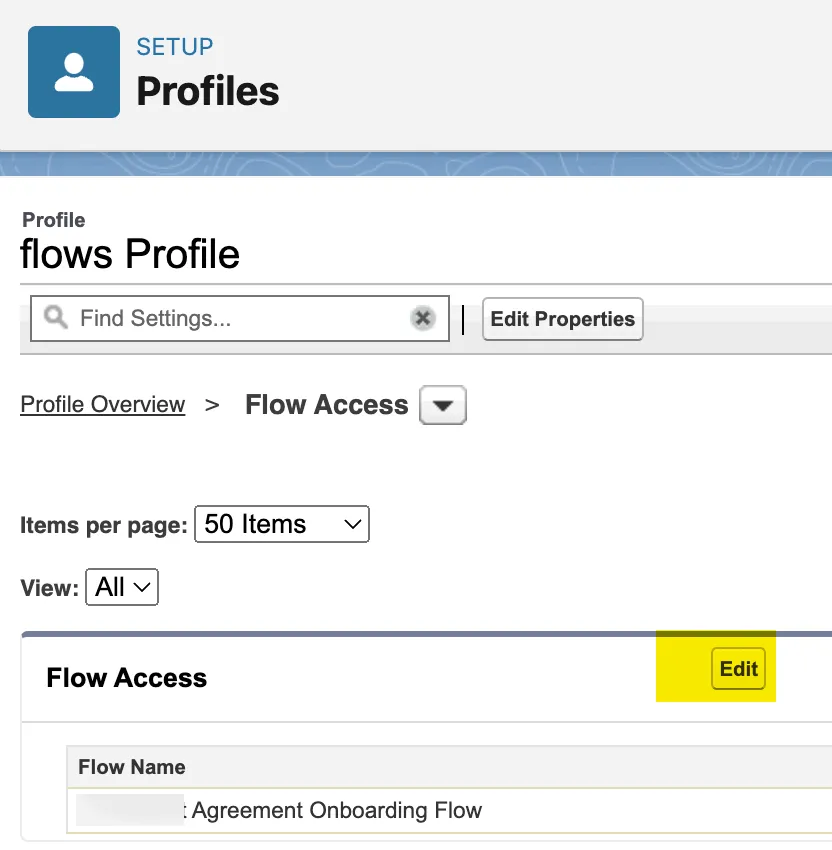
- Site Guest Profile - Select “Flow Access” and the flow should appear upon “Edit” of the access permissions. Include any overridden flows in the list accessible flows for the site guest user.
Room Flow Elements
- Validation. Verify the roomId, memberId, recordId inputs are provided. Redirect to a helpful error screen if any input validations are not successful.
- GET records for context. At minimum the RoomMember record is required. The Room (roomId) and source Salesforce record (recordId) are optionally available.
- Guide the end user through a screen flow, prompting for inputs and previewing before any final updates.
- Create or update records based on screen flow inputs.
- Provide the end user with a final screen indicating they have successfully completed the flow.
- All unhandled exceptions and faults should be redirected to an error page with instructions to notify their Sales Rep or other Administrative contact.
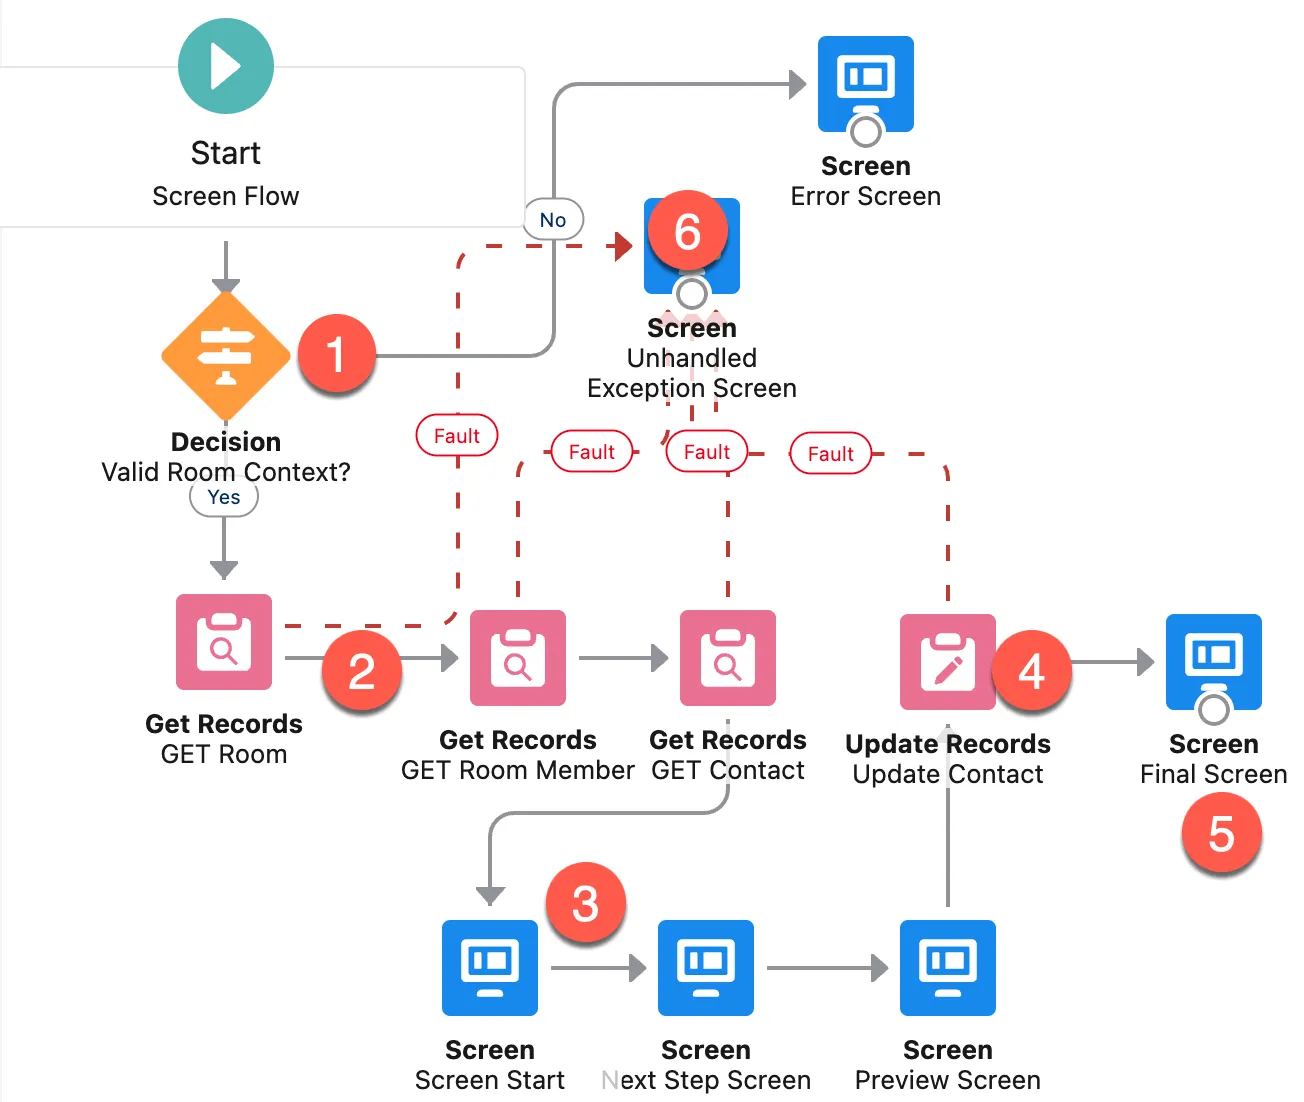
Screen Start Example displaying the input variables

Add a Flow to a Room
The final step is to drag-and-drop a flow or script plugin onto a room page layout using the Room Builder.
The following instructions utilize a script component for more detailed control.
- Drag a Script plugin on the room page canvas and paste the script below into the script editor.
- Paste the Salesforce Site URL. There are 2 references to be updated. 1 for the lightning out library and another for the lightning endpoint definition.
- Define the flow name to be loaded into the script.
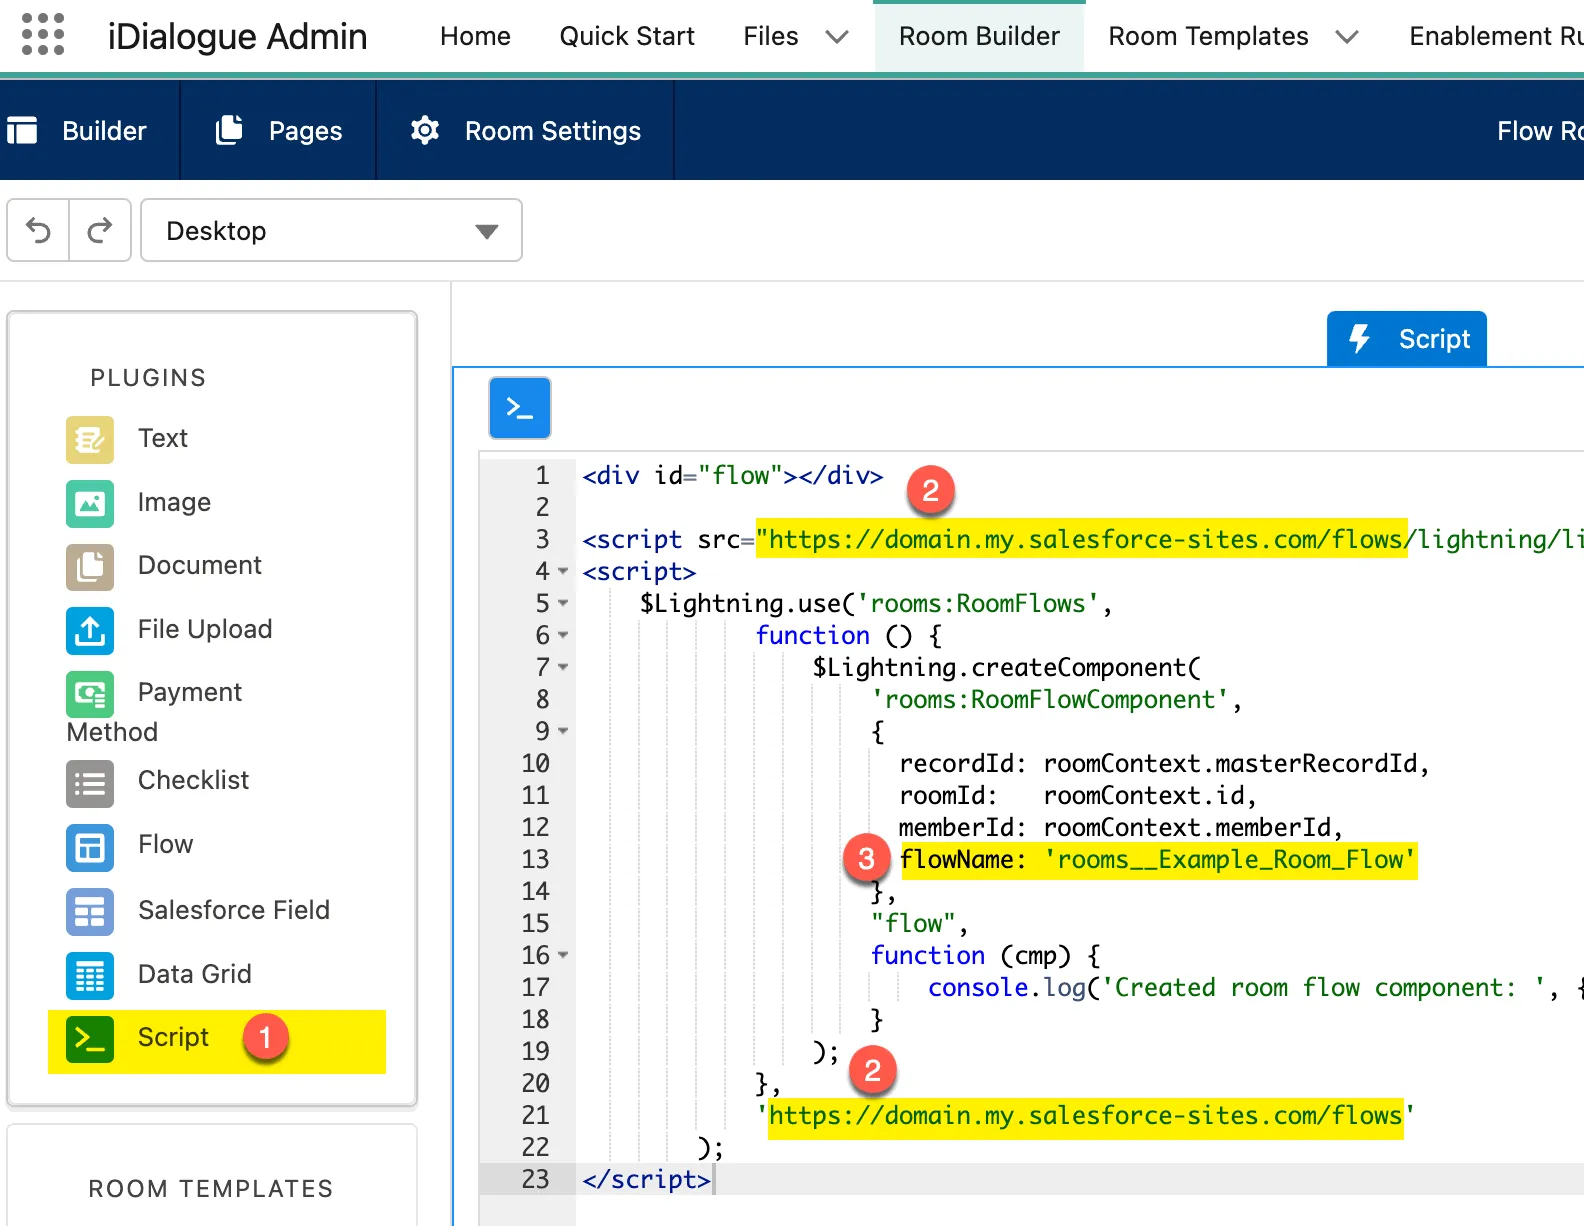
Flow Script
<div id="flow"></div>
<script src="https://paste_custom_subdomain_here.my.salesforce-sites.com/flows/lightning/lightning.out.js"></script><script>    $Lightning.use('rooms:RoomFlows',            function () {                $Lightning.createComponent(                    'rooms:RoomFlowComponent',                    {                      recordId: roomContext.masterRecordId,                      roomId:   roomContext.id,                      memberId: roomContext.memberId,                      flowName: 'rooms__Example_Room_Flow'                    },                    "flow",                    function (cmp) {                        console.log('Created room flow component: ', { cmp });                    }                );            },            'https://paste_custom_subdomain_here.my.salesforce-sites.com/flows'        );</script>
Testing
The flow will not render within the room builder. It will likely indicate a Lightning Out error message within the room builder because the input variables are not provided.
To test, add a Room Lightning component to a page layout, create a room, and invite a room member.
Copy the room member link into a browser to view the room/screen flow as the invited room member.
Access and Sharing Considerations
The screen flows within rooms are running under a Site Guest User and Profile.
The “Rule of Least Privilege” should be applied when granting access to the guest user. Only grant access to records that are needed to complete the flow.
The Salesforce session of the guest user is not leaked or visible in the room. The Room session grants access to a specific Room ID and Room member.
It is the responsibility of the screen flow to validate and enforce that only records related to the Room Member are viewed or updated in screen flows.
When following these practices, the room is secure and access limited to Room items/members.
Site Configuration - Air Gap Security
For maximum security, it’s recommended to grant site guest profiles access to only the Room, RoomMember, RoomItem records. Then build all I/O and web forms against those objects.
This creates an “air gap” between core CRM objects and external rooms and portals.
Considerations and Limitations
iDialogue screen flows in rooms are bound to limitations defined by Salesforce Lightning Out considerations and limitations.
The performance of loading the screen flow is limited to the Salesforce Site and Lightning Out library. There is no animated gif or image that indicates the flow is loading.
Room flows are not connected to other plugins on the page. Updates to information in screen flows will not update, for example, merge tag values in a text plugin until the room is refreshed.
The flow will consume 100% of the width of the client (desktop or mobile browser). The page layout may be configured for 2-columns to force a narrow rendering of the screen flow.