Email Setup and Configuration
Email Template
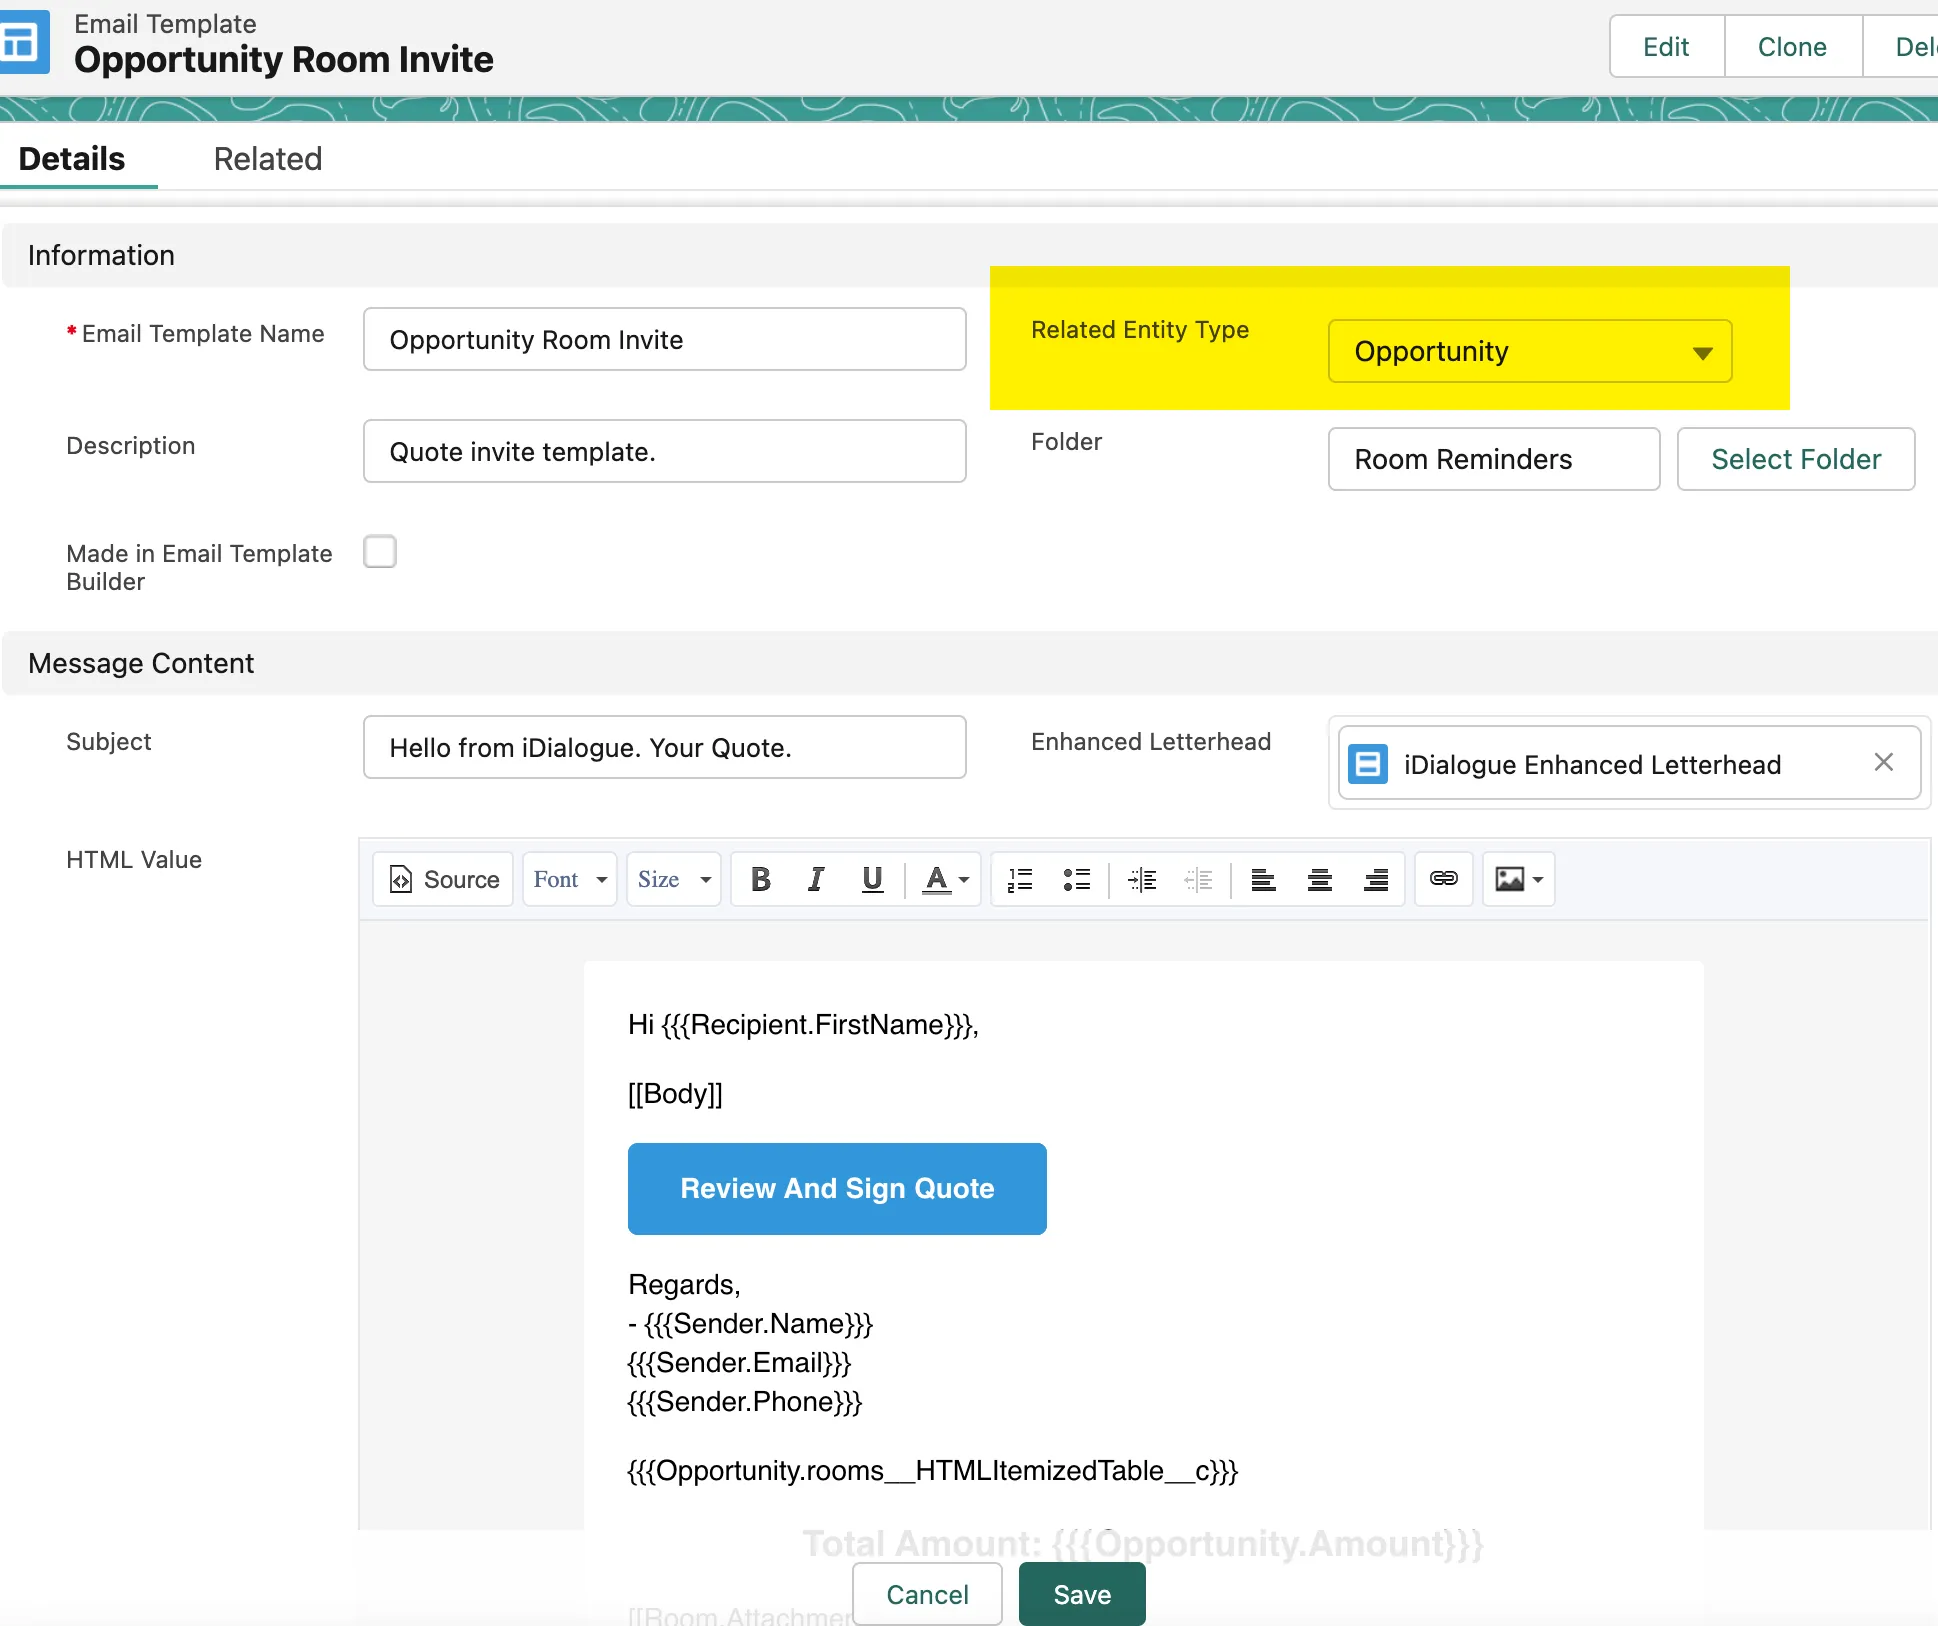
Start by creating a standard Salesforce email template. Use this template as a starter.
For opportunity room email, define the Related Entity Type as “Opportunity” (all entities are supported).
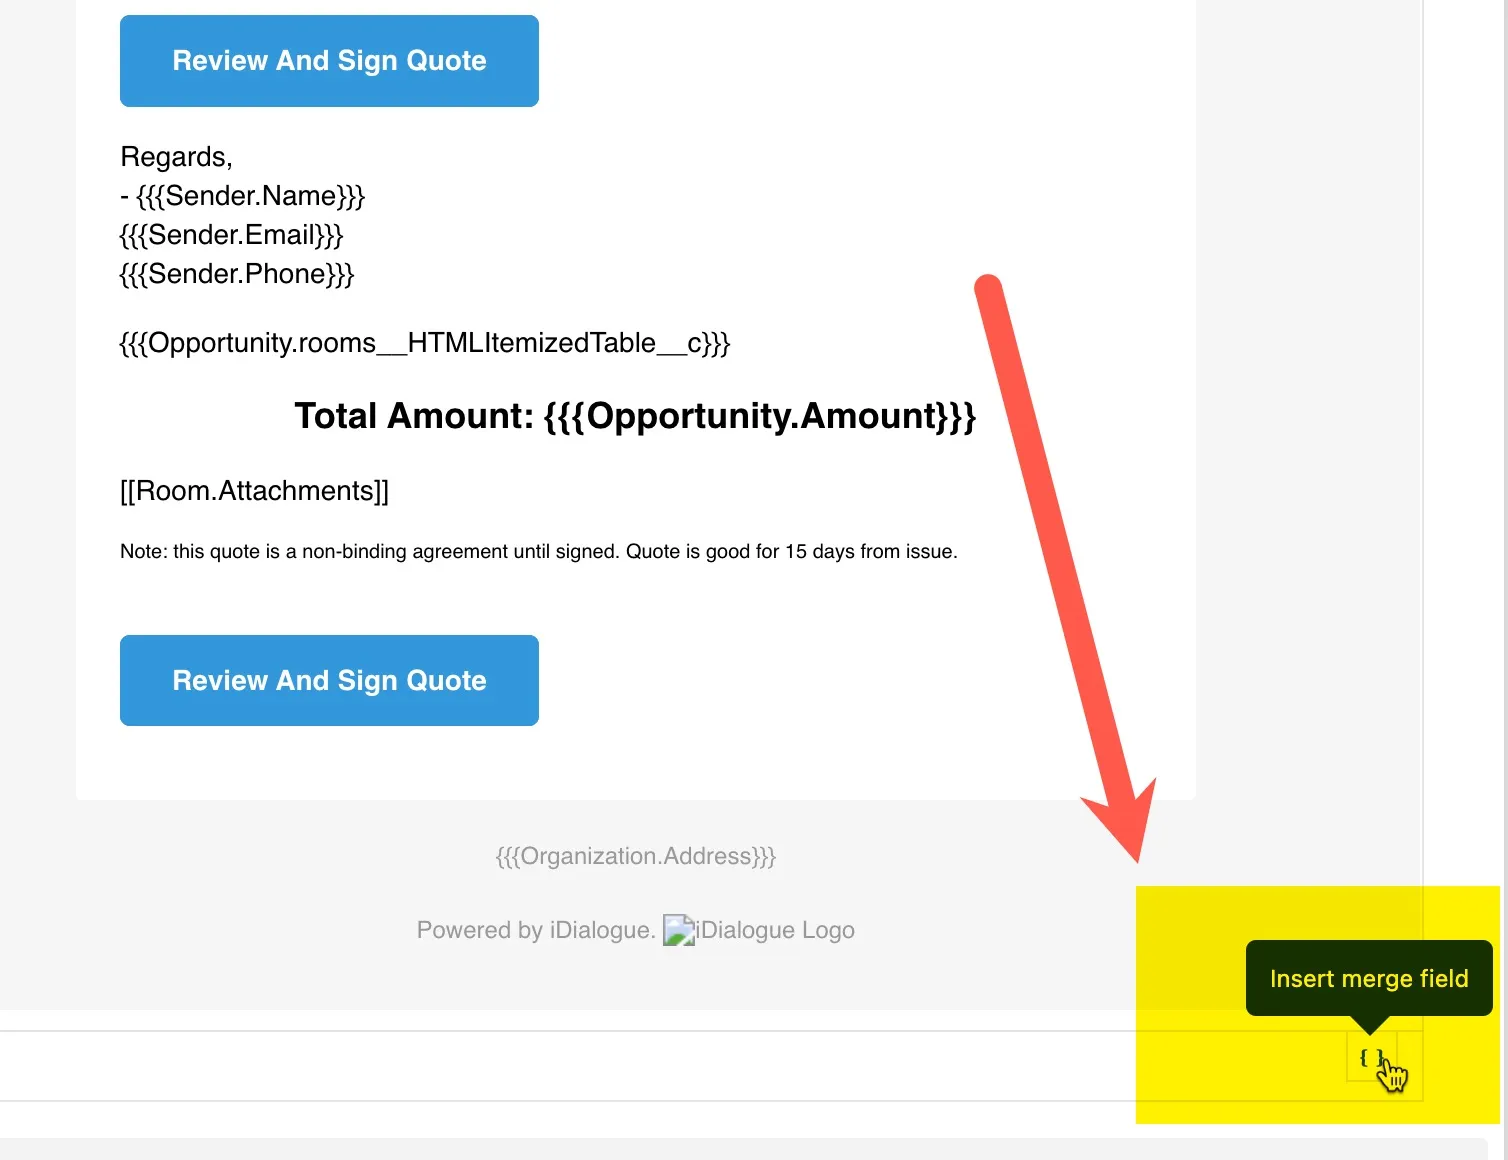
To insert merge fields into the template, launch the field selector from the lower-right {} icon.
Add any additional iDialogue API tags.
Room Templates
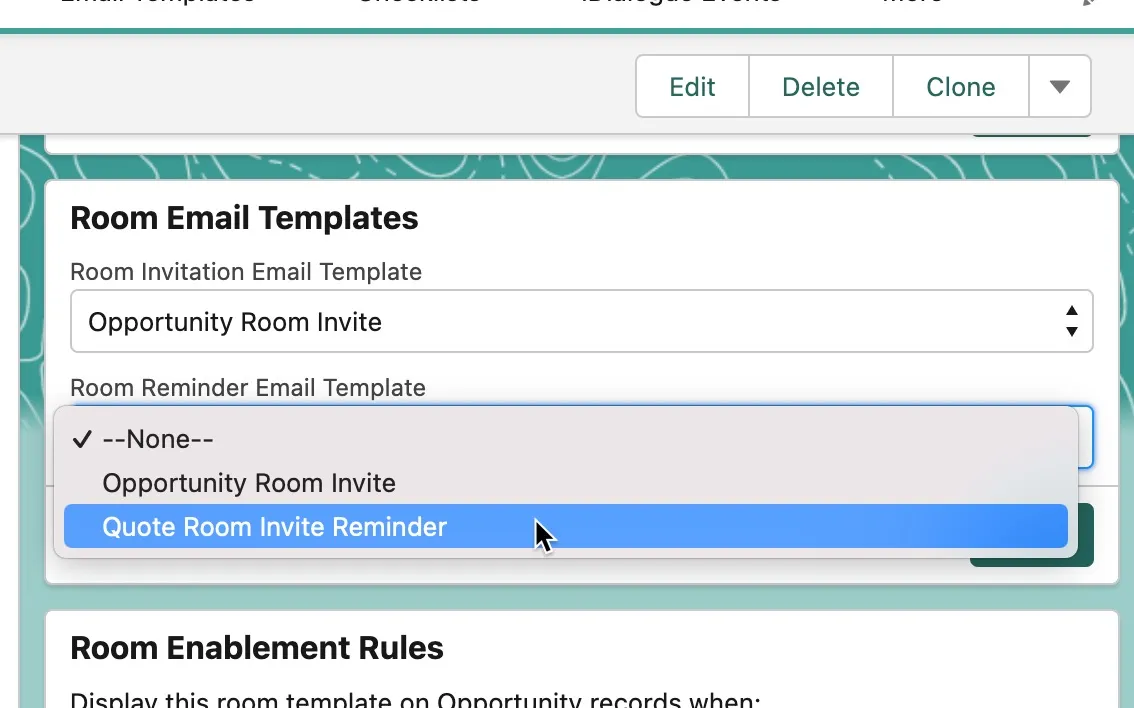
To associate an email template with a room, open a “Room Template” record and select the templates used for “Invite” and/or “Reminder”.
Note: If the “Room Email Templates” flow does not appear on the record page layout, then go to “Setup -> Edit Page” and add a flow component to the page layout (released in v1.150)

The associated email templates will only apply to rooms created after the template is defined for the room.
Room Component
When a Salesforce user adds a member to a room and invites them, and the room defines an Invite Email template, then the message body is merged with the email template [[Body]] tag.
If the email template does not contain a [[Body]] tag, then the Sales user input is ignored, and the email template is personalized entirely using related entity field tags.

Room Builder
It may be useful to update the default room notification to instruct users to personalize the message, if the [[Body]] merge tag is used in the template.
Note: depending on the iDialogue version, the Salesforce user may have more explicit control over email template selection and personalized messages.
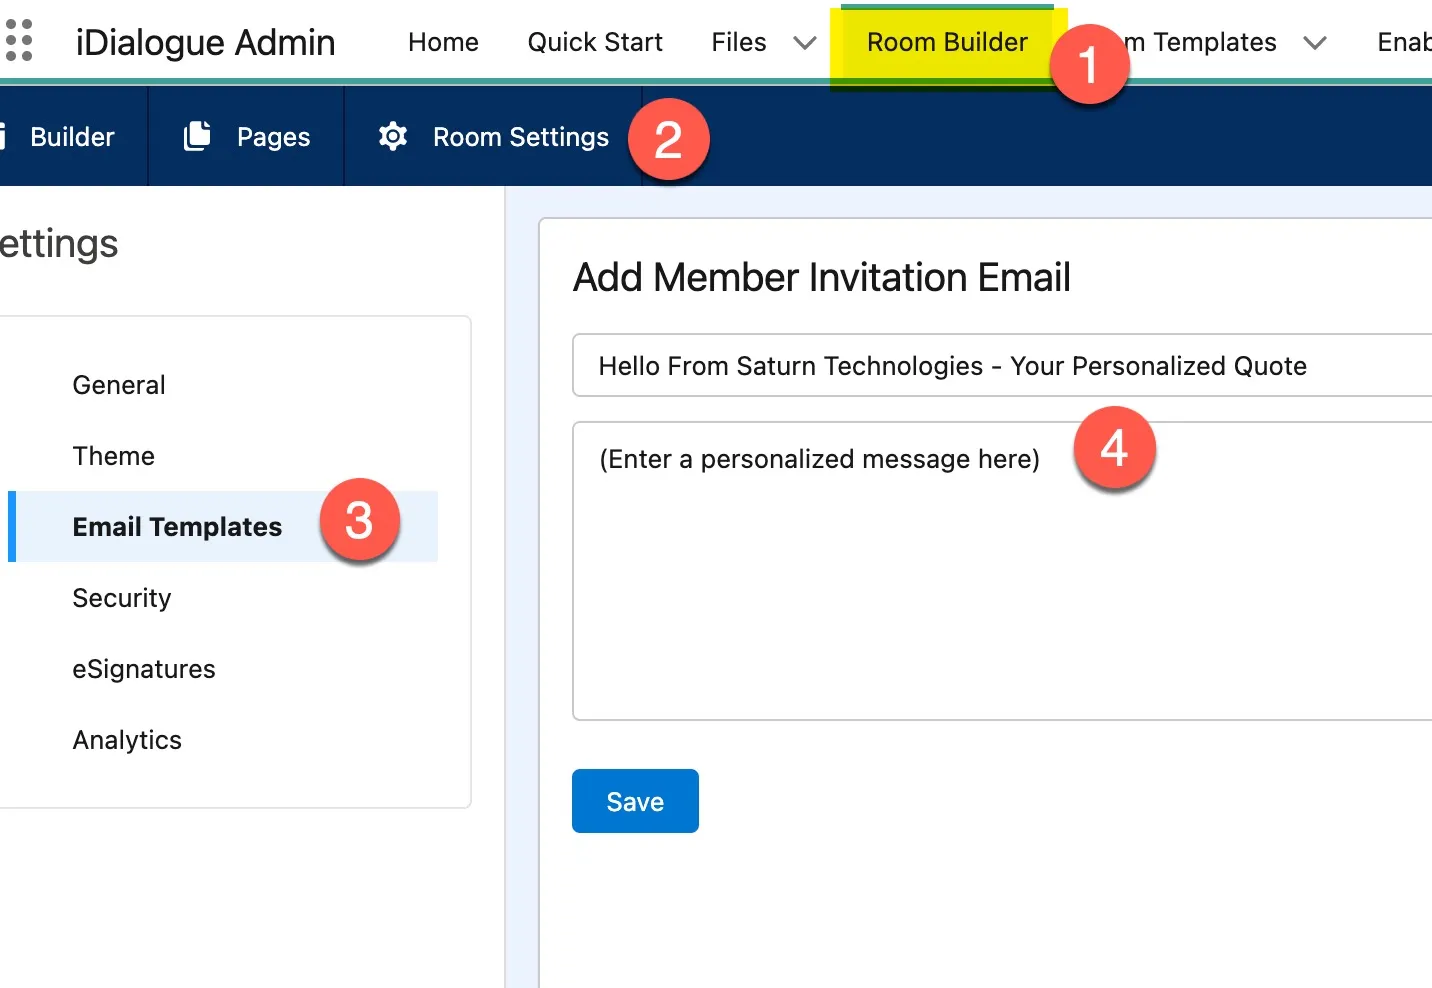
- Room Builder
- Select a room then “Room Settings”
- Select Email Templates
- Enter a default personalized message to be merged with [[Body]] tag.